


Caring for your Hultafors tools isn't just about keeping them spick and span; it's about preserving that undeniably Swedish craftsmanship that's as sharp as the blades themselves. Whether you're no stranger to the satisfying chop of a well-maintained hatchet or you simply admire the enduring quality of polyester sheaths, understanding the ins and outs of tool maintenance is key. Start by exploring Axeman's selection, where you'll find tools that have already been embraced by countless hands. Then, check out our Hultafors collection to see how these tools, from impeccably crafted hatchet and axe handles to innovative designs, redefine robust. Keep reading to learn the smartest, tried-and-true methods to ensure your tools stand the test of time and the elements.
Key Takeaways
- Regular Cleaning and Maintenance Keep Hultafors Tools at Peak Performance
- Proper Tool Storage Solutions Protect and Prolong the Life of Hultafors Tools
- A Tailored Approach to Sharpening Ensures the Longevity and Effectiveness of Each Tool
- Preventing Rust on Tools Involves Both Proactive Steps and Regular Inspections
- Matching the Right Hultafors Tool to the Job Enhances Work Quality and Efficiency
Essential Care Tips for Your Hultafors Tools
Alright, let’s roll up our sleeves and get into the nitty-gritty of keeping those Hultafors tools in tip-top shape. Trust me, it's not just about making them shine; it's about digging deep into what your specific tool needs to stay sharp, reliable, and ready for action. After you’ve put in the hard work, don't just toss your tools back into the cart or leave them to the mercy of the elements; a little elbow grease and care will extend their life immensely. Each time you use them, banish the dirt and give them a nice clean-down - this isn't just for looks, it’s essential. Keep an eagle eye out for signs of wear and tear; it’s like looking at your favourite workwear and knowing when it's time to retire it to the back of the closet. When it comes to finding the perfect home for your tools, don’t skimp! Think of proper storage solutions as the credit card of the tool world – don’t leave home without it. And speaking of edges, knowing when to sharpen those blades versus when to cash in and replace them is key. Last but not least, let’s talk about the arch-nemesis of all tools – rust and corrosion. Putting up defenses against these culprits means your cherished Hultafors can stand the test of time, rather than dissolve like chalk on a rainy day.
Identifying Your Tool's Specific Maintenance Needs
When I picked up my first Hultafors CLC pencil from a retail window display, I knew it was going to be an invaluable tool in my kit - precise, sturdy, and reliable. But identifying the specific maintenance needs of my Hultafors hatchet and axe handles, whether it's the telltale signs of wear on my CLC utility knife or the smudges on that trusty pencil, is a game-changer. From the quick wipe after a job to the deep-cleaning ritual I perform once a month, understanding what each tool needs to keep performing at its best ensures my gear is always ready and resilient.
Cleaning Your Tools After Each Use
After each outdoor adventure or woodworking session, my trusty Hultafors tools deserve a good scrub down, as grime and residue don't discriminate based on price or brand. Even if it's just a quick wipe with a plastic brush to dislodge sawdust or soil, I make sure my hatchet and axe handles equipment is pristine. And for tools with moving parts, like those that clip onto a carabiner, I pay extra attention to ensure they open and close as smoothly as day one. That’s my recipe for getting the most out of every tool, every time.
Regularly Checking for Wear and Tear
For any carpenter, there's always a silent alarm that goes off when your tools start showing signs of fatigue—it's that intuition honed from countless hours on the job. I make it a routine to check my Hultafors hatchet and axe handles steel tools after each use, especially the ones that take a beating like my trusty hammer, which dangles from my belt when I'm knee-deep in sawdust. And let’s not forget about my electrician’s pliers; even the slightest nick or twist in the metal could throw off my day's work.
[Insert additional rows for other tools and care as needed]
| Tool | Care Needed | Frequency |
|---|---|---|
| Steel Hammer | Inspect head for wear; Tighten handle | After each use/project |
| Electrician's Pliers | Check alignment; Oil moving parts | Weekly |
| Carpentry Square | Clean markings; Ensure right angles | Bi-Weekly |
Just like wrapping my hands in wool gloves before bracing the winter chill, I spare a moment to wrap my brain around potential issues before they arise. A glance over my tools' hatchet and axe handles edges, joints, and handles for any fishy wear or tear isn't just a chore; it's a cornerstone of my craft. Regular audits of my favorites—like the chisel and level—keep them aligned with my high standards and my work sharp as ever.
Proper Storage Solutions for Longevity
Every Hultafors hatchet and axe handles longs for a home as steady as the hands that wield it; hence, choosing the right storage is just like picking the perfect pair of snickers for a marathon - it matters. Tucking away my tools in a snug wooden toolbox not only safeguards them from environmental harm but also keeps them organized, saving me time and money in the long run. I wouldn't dream of leaving my leather-handled gear out to weather when I know proper storage maintains their integrity and sharpness for the next day’s work: it's simply smart tool-keeping.
- Identifying the appropriate storage for each Hultafors tool
- Investing in quality wooden toolboxes for optimal protection
- Organizing tools to save time and prolong their life
- Treating leather components with care, keeping them conditioned
When to Sharpen vs When to Replace
As a confessed hand tool aficionado, I've had my fair share of midnight oil burning sessions, squinting in the dim light of my flashlight trying to determine if my favorite chisel's bluntness was by my own doing or if it's time to hang up its hat. I've learned to trust my instincts—the same ones that tell me when to grab the electrical tape for a quick fix or hatchet and axe handles back to the shop for a replacement. The moment a tool loses its finesse and the edges resemble something you'd toss into your tool bag rather than proudly display on your workshop pegboard, I hold the receipt close, because sometimes, it's just wiser to start afresh. Check out our Hultafors collection
Protecting Your Tools From Rust and Corrosion
Keeping my Hultafors tools free from rust and corrosion feels almost like nurturing a friendship; you invest in their well-being for a long-term bond. It’s why I don’t flinch at grabbing items like rust inhibitors from top sellers like Klein Tools. Whether it’s for a screwdriver that’s seen its fair share of work or the bending bars that have endured more stress than a shipping container, proactive care means I’m not caught off-guard by corrosive surprises. Check out our Hultafors collection for hatchet and axe handles.
- Storing Hultafors tools in a dry, controlled environment.
- Investing in quality Klein Tools for maintenance.
- Checking for signs of rust before and after shipping tools out.
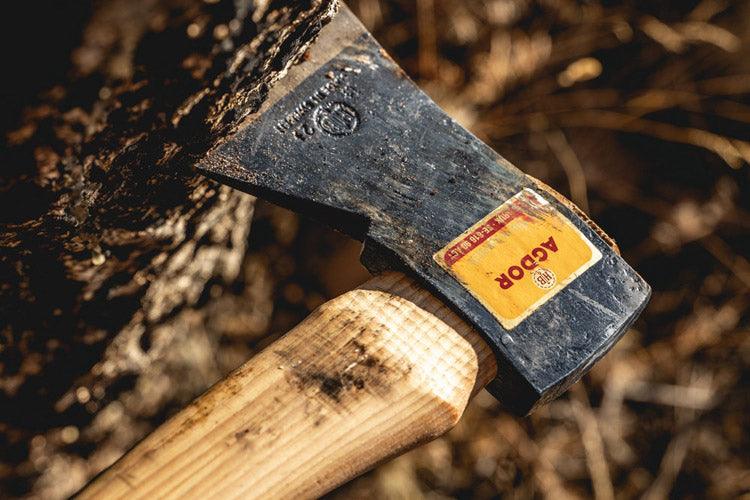
How to Maintain Sharpness of Hultafors Cutting Tools
Kicking off with the right edge on a Hultafors chisel can make the difference between a masterpiece and a mess, and that’s where knowing the intricacies of blade maintenance slides into play. Let's cut to the chase; maintaining the sharpness of Hultafors cutting tools is not just about a quick run over a stone. It's about understanding the art of differentiating between sharpening techniques tailored for each tool, whether it's my trusty tape measure blade or the precise edge of a chisel. Selecting the right sharpening tools is akin to choosing a method of payment; it has to suit the transaction, or in this case, the tool in hand. Charge into the world of honed excellence with me on this step-by-step guide that will unwrap the polishing process, ensuring each tool's edge is as keen as the feedback from a satisfied client. We’ll also learn to test for sharpness the correct way—because running a finger across the blade just doesn’t cut it, pun intended! And we can't forget the importance of the strap in maintaining that razor's edge with honing hatchet and axe handles, securing longevity out of every slice, dice, or shave. It's all about giving those tools the edge they deserve.
Differentiating Between Sharpening Techniques
Knowing when to use a honing stone for a fine-tuning touch versus a file for a more aggressive approach can be as crucial as ensuring information privacy for a customer's delivery. Every Hultafors tool in your arsenal, from the rugged hammer to the versatile hatchet and axe handles, requires a different sharpening method. It's all about the finesse; maintaining a razor's edge on my chisel demands a different rhythm and angle than the brute force needed to restore my axe's biting line. Check out our Hultafors collection,
- Use honing stones for fine-tuning the sharpness of precision tools like woodworking chisels.
- Reserve the use of files for heavier tools such as hammers and hatchets, where a more substantial material removal is necessary.
- Adapt sharpening techniques to match the specific wear patterns and steel grade of each Hultafors tool for optimal longevity.
Selecting the Right Sharpening Tools
Imagine you’re on the precipice of crafting something beautiful – it’s just you, your raw materials, and one crucial companion: your tools. Having hatchet and axe handles, the right sharpening tools is like choosing a carrier for your most prized possessions; it's got to be reliable and tailored to the job. Whether it’s the precision edge of a spirit level or the robust cheek of an axe that needs attention, I sift through my box of tricks to match each Hultafors wonder with its perfect partner – ensuring that when the tax of time comes to call, my tools remain indefatigable and sharp.
| Tool | Sharpening Aid | Sharpening Method |
|---|---|---|
| Axe | Rounded File | Smooth, consistent strokes maintaining the original bevel |
| Spirit Level | Honing Stone | Gentle back and forth movement to preserve delicate edges |
| Chisel | Whetstone | Angled slide method with water for that unparalleled sharpness |
Step-by-Step Guide to Sharpening Your Tools
Alright, let's slice into the process: When sharpening your Hultafors gear, it’s like gearing up for a northbound trek through the backwoods of North America – you need the right tools and the correct technique to make it effective and safe. First off, stabilize your accessory on a flat surface, hold the tool firmly, and then uniformly glide it against the sharpening device according to the tool’s unique requirements. It’s about power – applying the amount that’s just enough and not over the top – because too much pressure can harm both the blade and your discipline, and nobody wants that. Stick to this policy of precision, and your hatchet and axe handles cutting tools will remain as steadfast as a mountaineer on a cliff face. Explore Axeman's collection, Check out our Hultafors collection
| Step | Action | Notes |
|---|---|---|
| 1 | Stabilize Tool | Ensure the tool is secured and doesn’t slip. |
| 2 | Inspect Blade | Look for any deformities or areas needing extra attention. |
| 3 | Correct Sharpening Angle | Maintain the original angle of the blade for even sharpening. |
| 4 | Gentle Pressure | Apply light, consistent force when sharpening. |
| 5 | Consistent Strokes | Keep your movements even and controlled, avoiding any jagged motion. |
Testing for Sharpness the Correct Way
There's an art to accurately gauging the sharpness of a blade that doesn't involve a daredevil test on your fingertips. It's about respect for the tool and for my own well-being. For instance, I'll gently and carefully slice through a sheet of paper - a sharp edge will make a clean, effortless cut without snagging or tearing. That's a simple yet effective testament to a blade's readiness for action.
| Tool | Sharpness Test | Expected Result |
|---|---|---|
| Chisel | Paper Slice Test | Smooth, clean cut without resistance |
| Axe | Wood Shave Test | Effortless shaving of thin wood curls |
| Utility Knife | Tomato Test | Precise cut without squashing the tomato |
Maintaining the Edge With Honing
Maintaining the edge of my Hultafors cutting tools through honing is a ritual as satisfying as sipping that first morning coffee. It's not just about keeping them sharp; it's about respecting the blade's journey from raw steel to a polished performer in my hands. I take my time with the honing leather, running the edge across in a smooth, steady rhythm, breathing new life into the tool's edge with each pass—a simple yet effective way to ensure my tools are always at the ready.
The Right Way to Clean Your Hultafors Tools
Alright, let's dive straight in—it's maintenance time. It's not glamorous, but keeping your Hultafors tools clean is as critical as lining up that perfect cut. Before we plunge into the soapy water, there's a bit of prep work to do; ensuring your tools are ready for a scrub is the first order of business. You wouldn't bathe a cat without a plan, and the same goes for your equipment. Once they're prepped and we've chosen the right cleaners that won't corrode or damage, I'll walk you through the cleansing dance, step by intentional step. Afterwards, we've got to get our tools bone dry and refreshed with a dash of oil to keep them moving like silk. So, buckle in—let's get those tools of ours spick and span.
Preparing Your Tools for Cleaning
Embarking on the journey of tool maintenance, you've got to start with the basics: a well-laid plan for a pristine toolkit. Before diving in with suds and water, ensuring each Hultafors tool is ready for a proper cleaning is foundational. Assess your tools for any loose debris or particles clinging on from past projects; these will need to be brushed off so they don't become abrasive during the wash.
- Examine each tool, making mental notes of any spots that require extra attention.
- Use a dry brush or cloth to sweep away surface dirt, sawdust, or lingering grime.
- Have a clear workspace and all necessary cleaning supplies on hand, laying them out within arm's reach.
Choosing the Appropriate Cleaning Agents
Alright, I've seen firsthand that not all cleaners are created equal when it comes to Hultafors tools; some can be more of a villain than a helper. So, I reach for mild soaps or dedicated degreasers that love metal as much as I do. It's all about finding that goldilocks zone where the cleanser is tough enough to banish the gunk but gentle enough not to wage war on the tool's integrity.
Step-by-Step Cleaning Process
So, you've got your Hultafors tools laid out and you're ready to turn that grime into a thing of the past. First up, give each piece a good, gentle hosing down or a damp cloth dab if it's not too filthy. Then, take a soft-bristled brush dipped in your chosen cleaner and start working up a lather, paying particular attention to any stubborn spots without being too abrasive. Rinse thoroughly, making sure not a trace of soap is left because we all know residues are no friend to metal. Finally, grab a clean cloth and dry each tool meticulously, because moisture is the enemy, and we're not in the business of making friends with rust. There you have it, step by step, your trusted tools are back to looking their best without compromising their spirit.
Drying and Oiling Your Tools Post-Cleaning
Once the scrubbing marathon is over and every speck of grime has been banished, I take to drying my Hultafors tools like an artist finishing a masterpiece. A soft, lint-free cloth works wonders, absorbing every ounce of dampness until they're as dry as the humor in a carpenter's joke. Then comes the oiling - a squirt of lubricant here and a dab there ensure the moving parts of my pliers and the crevices in my adjustable wrenches glide effortlessly, staying protected against the rust that would love to take a bite out of my day's productivity.
Preventing Rust on Hultafors Tools
Staving off rust on your Hultafors tools is akin to warding off the bogeyman from your precious workshop treasures – it’s essential but often overlooked until it creeps up on you. Keeping these tools dry isn't just about wiping them down after a day's labor; it involves a comprehensive approach, blending DIY savvy with a keen eye for detail. I've discovered that a well-honed plan for moisture control can be the difference between a tool's long, fruitful life or an untimely demise. Crafting homegrown rust prevention solutions can also reinforce my arsenal, serving as an extra layer of defense. But even the best preventive measures must be paired with something just as valuable: regular inspections. Catching those tiny, telltale flecks of orange early can make all the difference, turning a potential full-blown rust invasion into nothing more than a minor skirmish. So let's dive in and build a fortress around our tools, marshaling the best practices to ensure they continue performing at their peak without the corrosion creep.
Importance of Moisture Control
Keeping a vigilant eye on moisture control is crucial in my battle against rust when it comes to Hultafors tools. It's not just about drying them off after use; it's about creating an environment where moisture can't linger and fester, like crafting a climate-appropriate wardrobe for each tool to shield it from the elements: tight, tailored, and impenetrable. Understand this - as a lover of fine tools, there's nothing more heart-wrenching than spotting the first signs of rust freckling the surface of a beloved Hultafors implement.
- Wipe down tools thoroughly after use to remove any residual moisture.
- Store tools in a dry location with low humidity to prevent moisture build-up.
- Use silica gel packs or a dehumidifier in the storage area to absorb excess dampness.
- Consider coating the tools with a thin layer of oil or rust inhibitor to provide a protective barrier against moisture.
DIY Rust Prevention Solutions
Rolling up my sleeves, I've concocted my own rust prevention solutions - it's part chemistry and part elbow grease. A homemade mix of equal parts oil and vinegar, brushed onto my Hultafors tools, sets up a barrier tougher than a two-day beard. After a thorough application, I give them a friendly wipe, sealing the deal against the moisture that loves to invade and corrode.
| Tool | Rust Prevention Solution | Application Method | Frequency of Treatment |
|---|---|---|---|
| Chisels | Oil-Vinegar Mix | Brush on, then wipe off | Monthly |
| Axes | Wax Coating | Apply with cloth, let set, and buff | Quarterly |
| Pliers | Mineral Oil | Apply with cotton swab to joints | After each deep clean |
Regular Inspections for Early Detection
Meticulous as a master clockmaker, I conduct regular inspections of my Hultafors tools: an essential practice for early detection of rust. Just like brushing away the cobwebs from a neglected corner, I probe every joint, crevice, and cutting edge with a keen eye: because catching a glimpse of rust's incipient shimmer is like spotting the first signs of an unwelcome weed, best snuffed out before it takes root.
- Examine each tool for the faintest hint of rust or discoloration.
- Focus on areas prone to moisture accumulation such as hinges and joints.
- Perform these inspections with the changing of seasons or after exposure to harsh elements.
Storage Solutions for Hultafors Tools
Alright, let's talk shop—specifically, how we're tucking away our cherished Hultafors tools. First off, it's about taking a hard look at where you're stashing your gear. It's not just shoving them into the nearest drawer; we're evaluating the space with a critical eye to make sure it’s doing right by our tools. I’ve got a few tips to share on how to organize your tools like a pro, ensuring every hammer, chisel, and wrench has its place and is easy to grab when duty calls. If you're knee-deep in humid conditions, fret not; there are ways to preserve your Hultafors collection from the tyranny of moisture. And don't think I forgot about giving you an overview of all the Hultafors goodies we've waxed poetic about in this guide. Plus, when it comes to choosing the right Hultafors tool for the job, I've got insights that’ll make sure your project and your tool are a match made in carpentry heaven.
Evaluating Your Storage Space
When I step back and size up where my Hultafors tools will spend their downtime, it's about more than square footage; it's about creating a sanctuary. Imagine each tool hanging in its designated spot on a pegboard or nestled in a custom slot within a toolbox: it’s not just organized; it’s a tool Utopia. Ensuring that every square inch of my storage space is tailored to the tools' needs doesn't just ease my workflow; it safeguards the instruments of my trade:
| Storage Feature | Benefit to Tools | My Implementation Strategy |
|---|---|---|
| Pegboards with custom hooks | Quick access and optimal tool visibility | Designate specific hooks for each tool type; arrange for most efficient retrieval |
| Toolboxes with padding | Protection from impacts and scratches | Fit sections with foam inserts that conform to each tool's shape |
| Shelving units with labels | Efficient organization and inventory management | Allocate shelves for different tool categories and label for easy identification |
Tips for Organizing Your Tools Effectively
Let's be real - organizing your Hultafors tools shouldn't be a game of hide and seek. My approach? I focus on simplicity and accessibility: Every hammer, every chisel, has its spot, and I know exactly where that spot is. Think about the workflow, the reach, and how often you're grabbing each tool; organizing this way not only speeds up the job but also prevents the clutter that could lead to accidental damage or a prolonged scavenger hunt for the wrench you swear was just there a second ago:
- Outline designated "homes" for frequently used tools close at hand for efficiency.
- Segregate seldom-used or specialty tools in clearly marked, out-of-the-way areas.
- Implement a system where after use, every tool returns to its assigned location, maintaining order and readiness for the next job.
Preserving Tools in Humid Conditions
Thwarting the invasion of moisture in a humid workshop is like guarding your secret stash of chocolate from your kids: it demands cleverness and constant vigilance. Environments that flirt with high humidity levels are notorious for shortening the lifespan of Hultafors tools with the threat of rust and corrosion, yet I’ve got a few tricks up my sleeve to keep them in mint condition, combating the damp like a well-orchestrated chess move against an unseen opponent.
- Slip silica gel packets amongst my tools to suck up unwanted moisture like a sponge.
- Coat my tools with a light film of machine oil, which acts as a moisture repellant cloak.
- Keep all my tools in airtight containers, turning them into mini fortresses against humidity.
Overview of Hultafors Tools Mentioned in Maintenance Guide
Throughout this guide, we've rolled up our sleeves and gotten our hands dirty (quite literally) with Hultafors tools: cycling from chisels to pliers, axes to hammers, and ensuring they all stay sharp, rust-free, and ready for anything. Each tool has its quirks and demands, its particular whisperings of care that, if heeded, promise to extend its life and efficacy: an axe craving a methodic dance across a whetstone, or the pliers that perform best with just the right amount of oil in its joints.
| Tool | Clean | Sharpen | Oil | Store |
|---|---|---|---|---|
| Steel Hammer | After each use/project | As needed | Lightly after cleaning | Toolbox/Pegboard |
| Electrician's Pliers | Regularly | Not typically necessary | On joints after deep clean | Padded drawer or pouch |
| Axe | After heavy use | When edge dulls | Oiling handle and head | Sheath and hang/box |
| Chisel | As required | Before signs of dullness | Post sharpening | Roll-up tool bag or slot |
Finding the Right Hultafors Tool for Your Project
Zeroing in on the perfect Hultafors tool for your project isn't just a box-ticking exercise; it’s about meshing with your work style and the task at hand. Like shopping for a new suit, finding that flawless fit means the difference between a job well done and one that’s just okay. When I face a unique challenge, I reach for a Hultafors tool with the precision, weight, and feel that becomes an extension of my hand, ensuring craftsmanship can shine through without resistance.
Conclusion
Proper maintenance of Hultafors tools ensures they perform efficiently, safeguarding your investment for the long haul. By systematically cleaning, sharpening, and storing your tools, you prevent rust and maintain optimal functionality. Regular inspections for wear and bespoke care for each tool protect their precision and extend their lifespans. Ultimately, a well-maintained Hultafors toolkit stands as a testament to a craftsman's pride and professionalism in every project undertaken.


Leave a comment (all fields required)